Thursday 12 November 2020

[#Blogged] - Salesforce Winter ’21 Release Notes Summary

 It’s here! The Winter ‘21 Release Notes are here, that is! In this crazy year of remote work, Salesforce has managed to bring us rays of joy in their releases, even if that means they don’t happen exactly on the dates we’d all hoped for. Just like I did in the Summer ‘20 release, I’ve gone through the notes to bring you headlines from the upcoming Winter release, so you can take time to plan out and schedule how you’d like to dive in. Below, you will find a long list of features, segmented by general topic. Keep in mind, this is intended for you to read through in the short amount of time you may have, so you can get a glimpse of what’s included, and take note of features you’d like to investigate further, as you have time.  The bullet points and images included are courtesy of the Salesforce Winter ‘21 Release.


General Changes


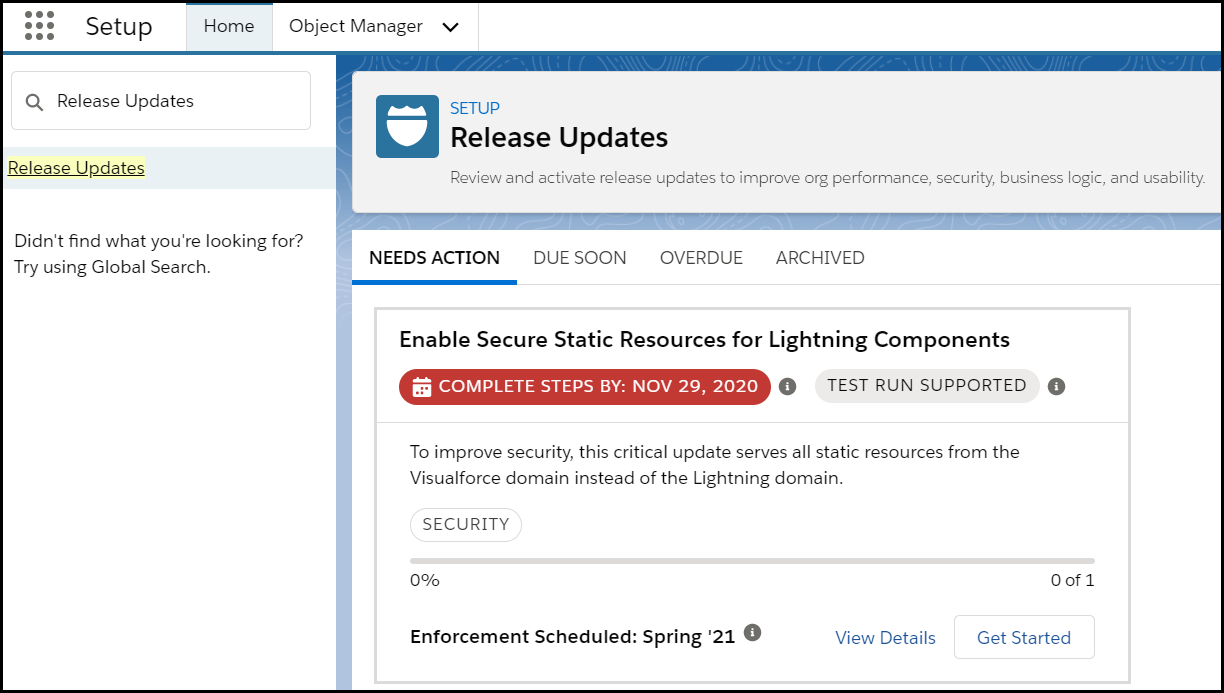
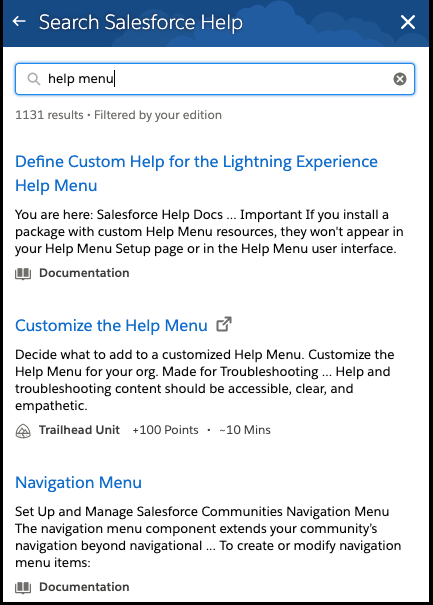
As usual, Salesforce does include a “general changes” section, which encompasses those that don’t pertain to just one cloud. They’re now offering one place to drive your multi-factor authentication implementation, and a new release for Salesforce Anywhere (as of September). You can also search for Trailhead documentation in the help menu! Take a look at some of the other great general changes being made in this release.


  • Drive Your Multi-Factor Authentication Implementation from One Place

  • Smarter Natural Language Searches (Beta)

  • Salesforce Anywhere: Plan and Accelerate Your Business in Real Time (Beta)

  • Add Custom Theme Colors to In-App Guidance

  • Search Trailhead from the Help Menu (pictured above)

  • Display Survey Pages Based on Your Data

  • Check Resource Availability Directly from External Calendars

  • Interactively Create Engaging Email Templates


Sales


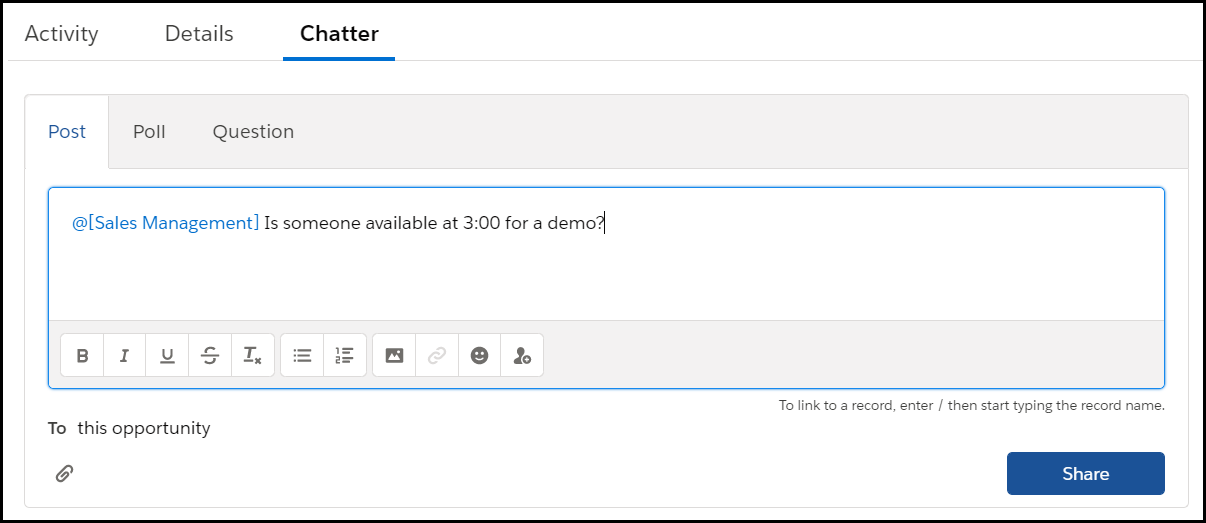
Salesforce included a good handful of updates for High-Velocity Sales, and I know we’re all celebrating the new, larger email deliverability size! There are also changes to Einstein Opportunity Scoring and it is now easier to assign a territory in Enterprise Territory Management. Check out the Sales Cloud changes below!


  • Amp Up Sales Cloud with Voice

  • Control Who Can Access Sales Cadences (High Velocity Sales)

  • Stay Focused with Session-Long Work Queue Filters (High Velocity Sales)

  • Choose Which Number to Dial for Click-to-Call (High Velocity Sales)

  • Find Changed Deals at a Glance (pictured above)

  • Enjoy Improvements to Einstein Opportunity Scoring

  • Get Forecasts on the Go

  • Update Opportunity Stages on the Forecasts Page in Lightning Experience

  • Enterprise Territory Management: Assign a Territory to a New Opportunity in Fewer Steps

  • Einstein Activity Capture: New Connection Options, More Control Over How Data Flows, and a New Email Insight

  • Easily Coordinate When to Meet with Insert Availability in Lightning Experience

  • Create Larger Emails with New Maximum Size of 35 MB

  • Streamline Contacts and Leads with Default Bounce Alerts


Einstein


I’ve decided to break up the Einstein changes into functionality vs. analytics. This section takes a look at the plethora of changes that are happening in Einstein. Don’t let the limited number of bullet points fool you - there are multiple changes across multiple clouds. You can use Einstein Recommendation Builder to deliver personalized recommendations, and utilize the natural language search improvements. Really take some time to dive into these awesome features - you’ll be glad you did!

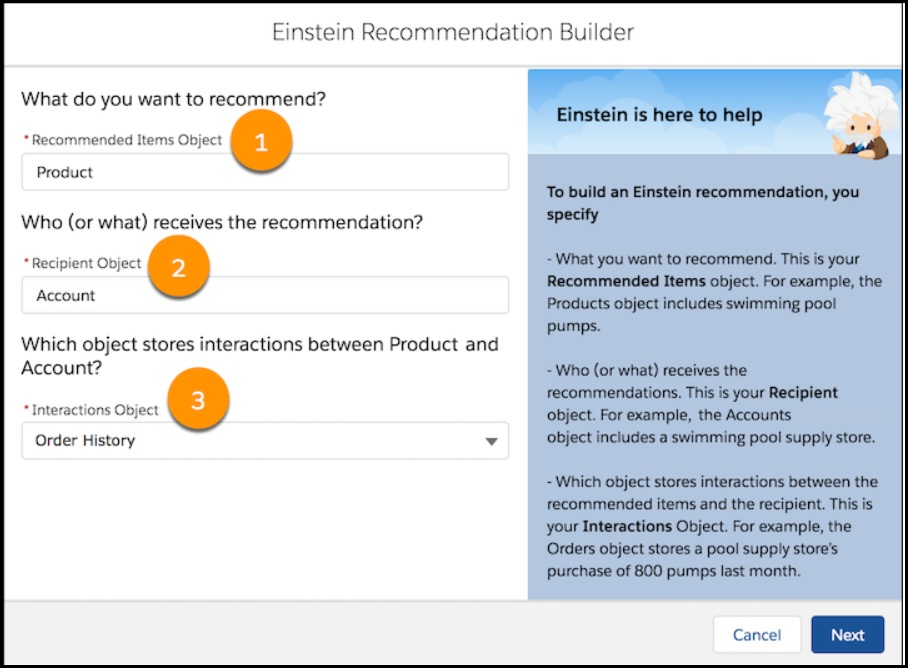
Populate the Recommended Items Object (1), the Recipient Object (2) and the Interactions Object (3) to utilize the Einstein Recommendation Builder.


  • Sales Cloud Einstein: More Control of the Opportunity Scoring Model, Global Models for Lead Scoring, and Big Improvements to Einstein Activity Capture

  • Einstein Discovery: Custom Improvements Text, Predict Outcomes in Process Automation Formulas, High Cardinality

  • Einstein Bots: Everyone Can Bot with Intro Template, Intent Model Enhancements, and New Permissions

  • Einstein Builders: Deliver Personalized Recommendations (Beta), and Show Confidence Range and Top Predictors on Records for Numeric Predictions

  • Einstein Vision and Language: Image Recognition and Natural Language Processing

  • Einstein Search: Personalization (Generally Available), Easier Setup at the Org Level, Smarter Natural Language Searches (Beta), and Searchable Renamed Objects Using Natural Language Search


Reporting & Einstein Analytics

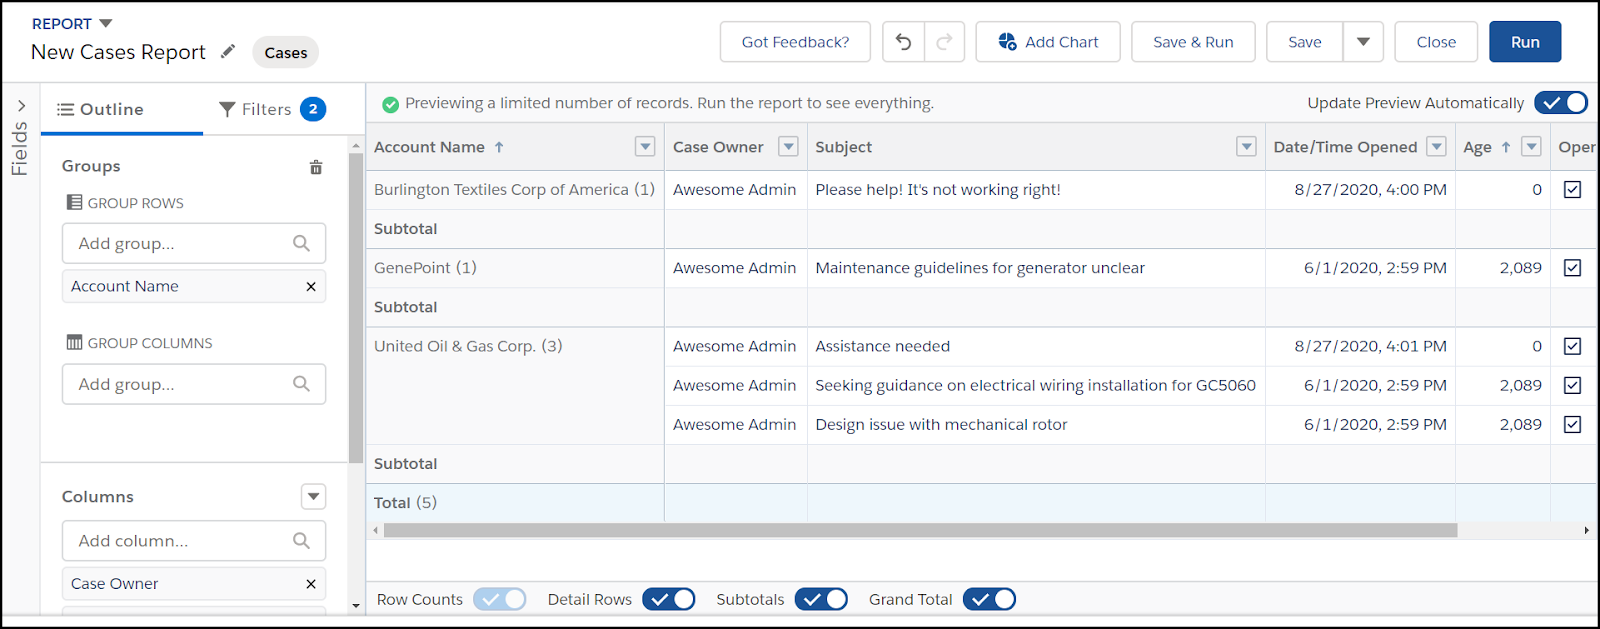
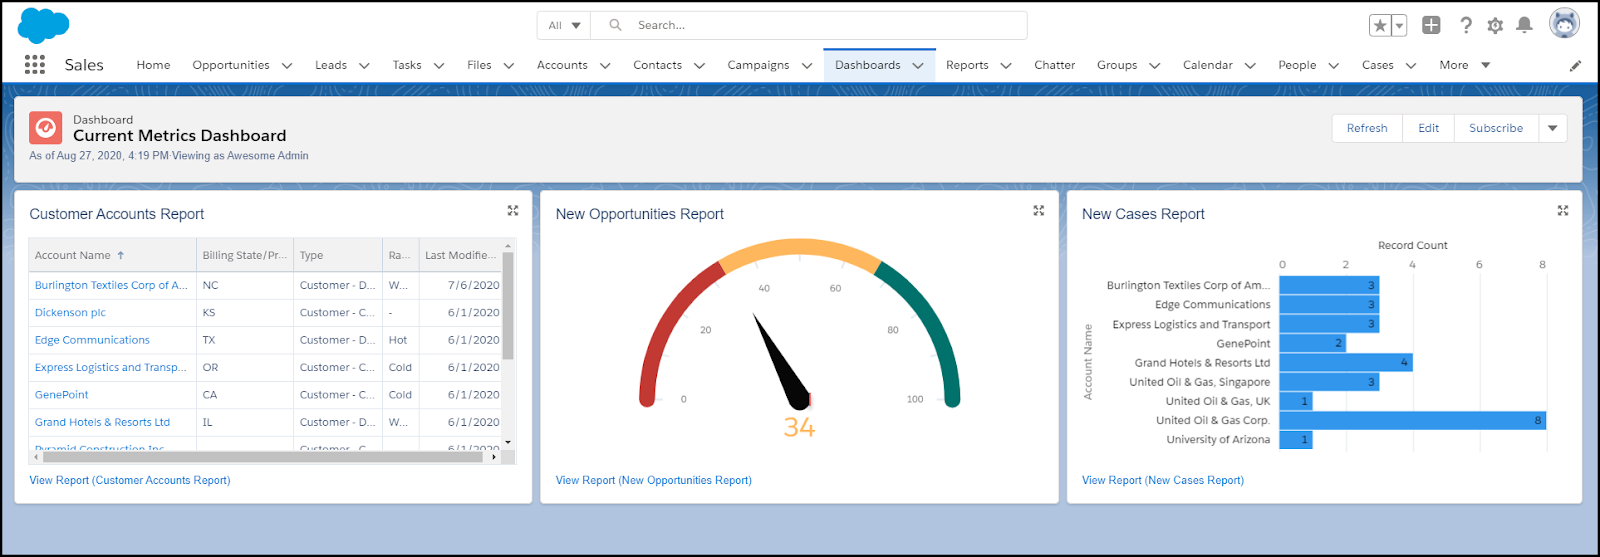
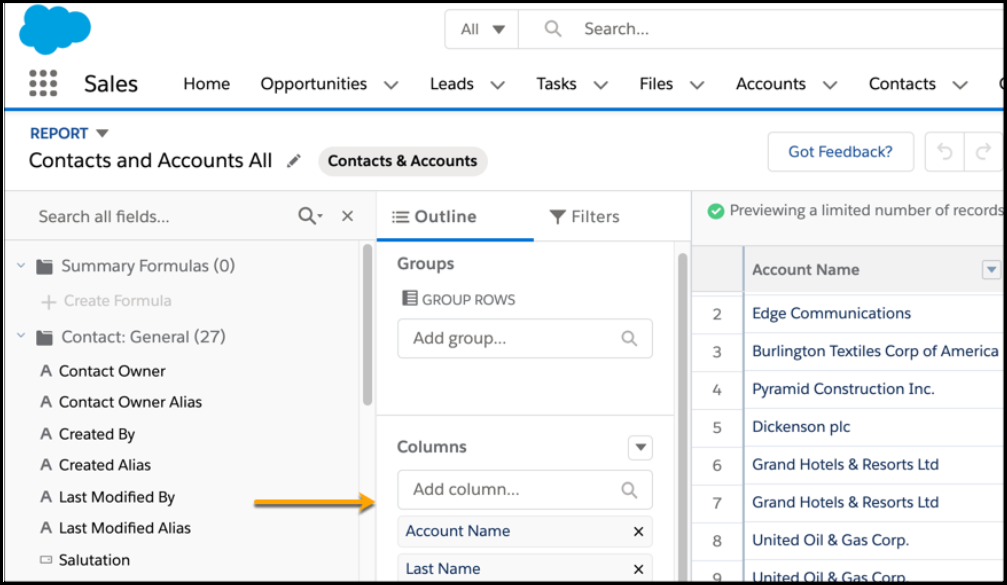
Although there was not a long list of reporting changes to standard reporting, the one they did release is a big one: you can now automatically add custom fields to custom report types! Whohoo! The Einstein Analytics release changes aren’t too shabby, either - a lot of Beta and Pilot features in this one, including reusable dashboard components, and utilizing your local timezone for your insights. Check these out now!


  • Avoid Stale Salesforce Data in Snowflake with Sync Out (Beta)

  • Build Calculated Formula Columns with More Functions in Data Prep

  • Calculate Dates with Click-Not-Code Date and Time Transformations

  • Quickly Calculate Statistics with Aggregate Functions

  • Freeze Some Table Columns, Scroll Through the Rest

  • Expand or Collapse Grouped Columns Faster

  • Add Accuracy to Your Insights with Date and Time Data in Your Local Time Zone (Beta)

  • Protect Data in Embedded Dashboards with Locked or Hidden Filters

  • Save Time Creating and Managing Dashboards with Reusable Dashboard Components (Pilot)

  • Embed Predictions in Your Dataset During Data Prep (Pilot)

  • Implement External Models in Your Salesforce Org (Pilot)

  • Build Accurate Models Using Random Forest Algorithms (Pilot)

  • Jump-Start Story Creation Using Templates

  • Auto add fields to Custom Reports Types (Beta) (pictured above)


Services


Just like with Sales Cloud, the Winter Release offers a lot in the way of Service Cloud, as well, for 2021. There is now a faster way to set up the Service Console, and they are now offering (drumroll, please…) a Microsoft Teams integration! Another amazing platform to keep your team connected! I was really impressed with some of the features in Service Cloud for this release, but don’t just take my word for it!


  • Service Setup Assistant: Go from Zero to Console in Minutes (pictured above)

  • Spend Less Time Setting Up Voice with Improved Setup

  • Kick Off Lightning Flows, Processes, and Workflows Based on Voice Call Records

  • Work More Efficiently on Voice Call Records with Macros and Quick Actions

  • Transfer Callers to the Right Agent with a More Intuitive User Interface

  • Get Warnings to Avoid Ending Calls Accidentally

  • Facilitate Training with Service Cloud Voice Transcript Monitoring

  • Dial Phone Extensions with the Built-In Keypad

  • Streamline Bot Responses for Screen Readers

  • Knowledge Enhancements for Channels (Including Voice)

  • Use Omni-Channel Skills-Based Routing Rules to Route Chats and Messages to Agents with the Right Skills

  • Monitor Service Cloud Voice Transcripts in Omni-Channel Supervisor

  • Microsoft Teams Integration: Bring Salesforce and Microsoft Teams Together for Service Reps (Pilot)

  • Improve Agent Interactions with Prebuilt Flows


Communities

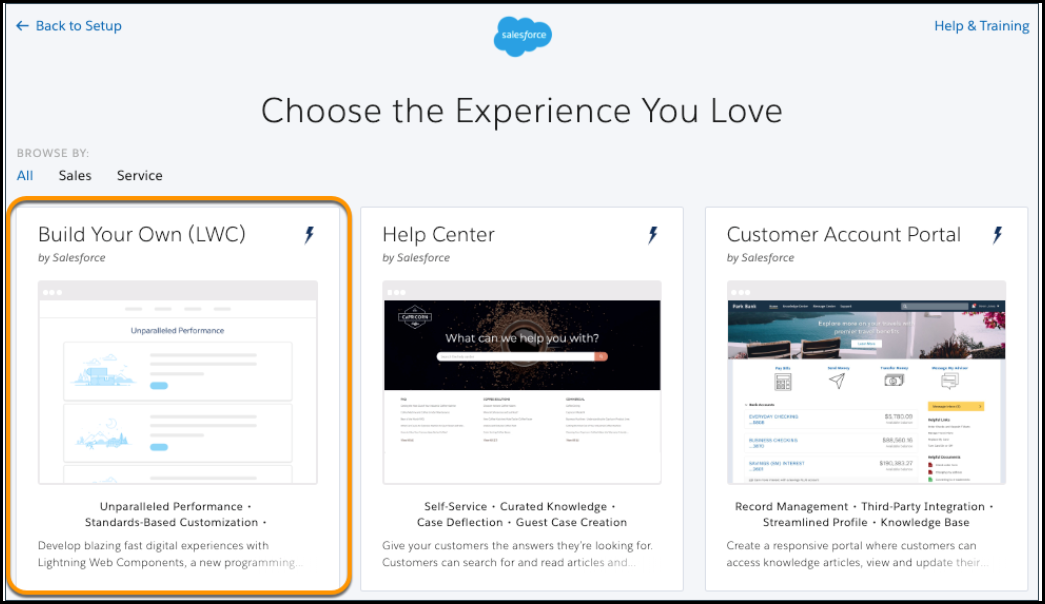
The Community Cloud brings forth a really awesome Build Your Own (LWC) template option in pilot mode for the Winter ‘21 release this year, and as they’re always on top of Guest user abilities, allow you to reduce object permissions, and allow users to authenticate via SMS. Learn more below!


  • Manage Your Pages and URLs with the Pages Menu

  • Apply Audiences to Record Detail Pages with Record-Based Criteria

  • Print Lightning Community Record Details and Lists with Printable View

  • Build Fast, Efficient Experiences with the LWC-Based Template (Pilot) (pictured above)

  • Reduce Object Permissions for Guest Users

  • Let Users Authenticate by SMS

  • Customize Notifications for Changing Email Addresses

  • Enable Article Sharing for High-Volume Community Users


Field Service

Wait, shouldn’t this be called “Field Service Lightning”? Nope! As part of the Winter ‘21 release, Salesforce has changed the name to be more succinct and efficient. But, that doesn’t mean they left out any great features. Field Service is still the great tool you’ve come to know and love, and with this release, you might even love it just a little bit more.


  • Record Product Warranties

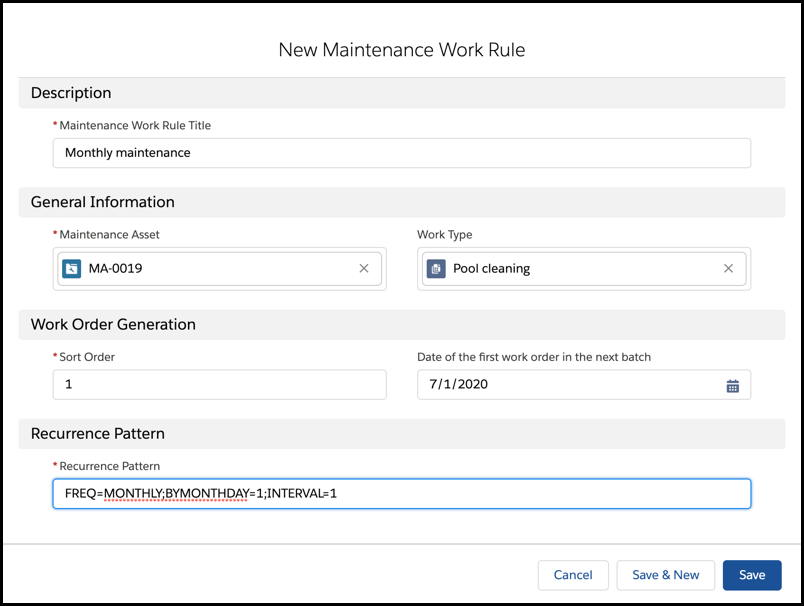
  • Improve Preventive Maintenance with Advanced Recurrence (Beta) (pictured above)

  • Get the Total Price on Service Contract Line Items

  • Target Work Priorities Using Service Appointments

  • Shape Up with New Tests in Health Check

  • Send Meaningful Messages Using Custom Notifications

  • Never Miss a Message in Notifications


That wraps it up for Winter ‘21! As you know, there are a lot of other features that are still great, but I just wasn’t able to fit it all in! I look forward to taking advantage of all that Winter ‘21 has to offer soon, and know you’ll be right there with me! 


Thursday 29 October 2020

[#Blogged] - Salesforce Administrator Guide: Propelling your Career Forward - Part 10


Path 10: Keep your Org Healthy and Updated

In Part 10 of my series on Salesforce Administrator Guide: Propelling your Career Forward, I think it’s important to discuss how to keep your org healthy and updated. It’s so easy to become bogged down in the day-to-day shuffle, as you’re hustling to finish projects on time, and deliver great customer service to your internal users, however, I can’t stress enough the importance of keeping your Org in top shape as those hours turn into months or years. Salesforce does a great job of providing resources to utilize so you’re more familiar with org limits and general health, but it’s really up to you to make use of that information.


Because of the breadth of Salesforce, I’m going to go over just two features that you can use as an Admin to check in on the state of things, but that can help you in staying aware and planning on the next steps you’ll need to take moving forward to keep your org healthy.


Health Check

In Setup > Quick Find, you can find the Health Check with a simple search. This feature shows you how well your org compares to expected Salesforce security standards. You can find more information on each of your risks, and identify which are high, medium, or low risks. It also shows you areas where you are compliant, so you can see the progress you’ve made as you work through what needs to be addressed.


Image: Health Check of your Org


This is a great tool to utilize a few times a year so that you can plan out the updates you need to make and prioritize time for making critical changes for the sake of the org, versus enhancements that are “nice to have”. When this is paired with the next tool, you’re sure to rest easy with feeling empowered to make the necessary changes for your org to function like it should.


Release Updates

Release Updates is new, as of Summer ‘20, but encompasses the older “Critical Updates” section you may have seen in the past. I have to say, this is much better! It’s easy to become overwhelmed with release notes and trying to figure out which updates and enhancements are great for your org. Now, you can do a quick Setup > Quick Find search for “Release Updates” and see it all laid out, with no 500+ pages of reading necessary!


Image: Release updates let you know what needs to be done now!


This is great for letting you know what is past due, due soon, or overdue and helps you break down the changes into actionable steps, with links to appropriate documentation, as well. It also tells you why this particular update is necessary, so you can better prioritize which changes really need to be made first. The archived tab contains enhancements that may have been baked into newer releases or are no longer applicable. Either way, this saves you time and can help you plan for emergencies that need to be addressed immediately.


Well, that wraps up my 10 part series of my Salesforce Administrator Guide: Propelling your Career Forward! I hope you have learned some great information along the way, and feel more empowered to tackle that next big goal you’ve set for your upcoming weeks, months or year. You absolutely can be an amazing Salesforce Admin, and I’m honored to have been a part of your journey! 


Thursday 15 October 2020

[#Blogged] - Salesforce Administrator Guide: Propelling your Career Forward - Part 9

Part 9: Become a Master of Chatter

In Part 9 of my series on Salesforce Administrator Guide: Propelling your Career Forward, I want to talk about a useful tool that can often be overlooked,even by advanced Admins and companies that have had Salesforce for a while. That awesome tool is called Chatter! 


Chatter is a messenger tool utilized within Salesforce so your end users can better communicate without leaving the platform. Want to leave a note for your manager on a record that can send them an email, notifying them immediately? Need to pull in colleagues from other departments to collaborate on a specific record, such as a customer support case? Or need to send messages automatically via Process Builder on certain records? All of the above - and more - can be done in Chatter. You can have private groups, public groups, and make posts on object records and user records. End users have the ability to dictate how frequently they receive emails on posts, so they’re not feeling overwhelmed. And, you can follow records that are of interest, such as a big customer, or someone you need to keep an eye on. 


Image: Your Sales team can quickly reach out to a user or group by tagging them on a record


While I could write many posts on the use cases of Chatter, for now, I want to go over how you, as an Admin, can navigate through some of the different areas of Chatter more efficiently. 


How do you turn this thing on?

Chatter must be enabled in your org, and there are settings that can be established, as well, before users can jump in and start making posts, questions or polls. By navigating to Setup > Quick Find and searching for “Chatter”, you can quickly find the “Chatter Settings” tab. 


Image: Chatter Settings must be enabled before it can be utilized


This is where you will enable Chatter, if it is not enabled already, and can turn on special features, such as Draft Posts, which allows users to draft instead of sending right away, or allow for approval requests to be sent in chatter as well. There are many other features that make the end user experience more valuable that are nestled here on this page, but this is not the only area of Chatter you should be familiar with. Next, let’s look at the Chatter app itself, and the functionality it contains.


What can I do in the Chatter App?

The Chatter app is where you will spend most of your time when it comes to working within Chatter. The app contains tabs that allow you to set up groups that can be tagged in Chatter (such as the Sales Management group in our first image above), see a list of chatter posts related to records you’re following, and allow you to determine how frequently you see emails related to chatter. In some cases, it makes sense to see every post, but other times, you may only need a daily digest. 


Image: In the Chatter App, you can access groups, people, and how frequently you receive emails from Chatter


Assisting your end users will more than likely occur in the UI, and areas such as the privacy of their posts, how they adjust email notifications for Chatter, and how to tag certain groups. It’s just as important to feel comfortable with the Chatter App as it is with Chatter Settings.


This is just the absolute surface of Chatter, and it’s a great tool to learn. You can find out more in this awesome Trailhead called Chatter for Lightning Experience!


Friday 9 October 2020

[#Blogged] - Salesforce Administrator Guide: Propelling your Career Forward - Part 8

Part 8: Get the Skinny on Reports and Dashboards

Back in Part 2 of our series called Salesforce Administrator Guide: Propelling your Career Forward, I discussed basic admin skills to master in order to increase your value as a Salesforce Admin. Today, for Part 8, I want to dig a little deeper, specifically into Reports and Dashboards, as this is a great skill to master and will allow you to further support pretty much every department in your company. Let’s discuss what they are and why they’re important.

Reports

Image: Report Builder in edit mode...also where the magic happens!


Whether it is your Sales manager looking for the number of Closed Opportunities for the month, or a Customer Support representative trying to better understand how they’re spending time on their cases, Salesforce reports are a crucial tool for chopping up information into easy-to-digest pieces. Before you dive in, there is something important you must understand - if the data doesn’t exist in Salesforce, then the report cannot display it. Unfortunately, there is a misconception (usually amongst end users) that the reports can pull your company data and analyze it in a flash. While it can provide great results in a small turnaround time, it can only be as good as the data in the system. Poor data equals poor reporting. 


Once you’ve got a handle on implementing good data practices, it really is fun to jump right in. When creating a new report, think of it as a blank canvas holding every single record you have in Salesforce, and you get to narrow it down (with Filters) and organize it (with the ability to group rows and group columns). You also get to decide which parts of the data you want to actually see in the report (which are your columns). On the Report Editor, you also get to show Subtotals, and the Grand Total, which is great for summarizing your numerical data.


Keep in mind, this is just the tip of the iceberg. But once you create (and save!) a report, you need a great way to display it, right? Well, that’s where dashboards come in.


Dashboards

While you can add charts to reports, dashboards offer a collective view into multiple metrics in one glance. Your end users can start their day by diving into a refreshed dashboard as they sip their coffee, and focus in on the areas that need the most attention without wasting any time.


Image: Understanding data is much easier when it’s visual.


Dashboard parts are called components, and each component consists of one report. But what if my company needs to see more than three components!? No worries - think of a dashboard as a corkboard with malleable features, as you can squeeze in up to 12 columns and 20 components in a Lightning dashboard. You can display the data in graphs and visuals that best suit the information. Maybe you need a gauge to push sales reps to move that needle this quarter, or you need a bar graph to show comparisons between team members working towards their goals, or you simply need a short list of 5 accounts that need the most attention right now. Either way, there are numerous ways to display the data, and you get to design it the way you see fit.


Reports and Dashboards are one of the most commonly requested tools to show company analytics, and they’re actually really fun and easy to learn. Get started today by searching for Reports or Dashboards tabs or search your App Launcher.


Thursday 24 September 2020

[#Blogged] - Salesforce Administrator Guide: Propelling your Career Forward - Part 7


Part 7: All about Data Import and Data Export

In Part 7 of our series Salesforce Administrator Guide: Propelling your Career Forward, I want to talk about Data Import and Export.  There will inevitably come a time in your Salesforce Admin career when you will need to handle large amounts of data. Fortunately, this does not mean you will have to spend hours upon hours painstakingly updating each record individually. Whether you will be asked to update large batches of records, or store records periodically for auditing purposes, knowing how to import, export, and manipulate data correctly is a crucial skill to learn early on. Let’s take a look at a few native Salesforce tools that you can utilize to perform these tasks.


Data Import

Importing data is when you take data from another source, such as an excel spreadsheet, and bring that data into Salesforce, matching it appropriately on the records you have already existing. This is referred to as an update. You can also use data import tools to create brand new records, as well.


The Data Import Wizard allows you to import data for both standard and custom objects, as long as the batch sizes are less than 50,000 records. If you have more than that, you can still make updates, but must break down your import into separate batches. 


Image: Data Import Wizard


The Data Import Wizard is fairly easy to use, as long as you have your data appropriately prepared beforehand, and know the API names of the fields you wish to adjust. You can find this tool by searching for “Data Import Wizard” in the Setup > Quick Find menu.

Data Export

There are a few ways to export data from Salesforce into various locations. Although not a tool, per se, an Admin with “Export Reports” permission can choose to create and filter reports to identify necessary information, and export as a .csv file on their computer. This is actually a commonly used step to manipulate data for updates, to be imported back into Salesforce.


There is also a Data Export tool which allows you to set up exports on a schedule. This is great for allowing large amounts of data to be pulled at convenient times of day, such as off-peak hours late at night, so as to not interfere with functionality of your Salesforce org.


And then there’s Data Loader…

Data Loader is also a native tool that does both importing and exporting of data into and out of Salesforce. This is great for loads that the Data Import Wizard cannot handle, and can accommodate up to 5,000,000 records! Data Loader also allows you to update, create or delete records and can be used for objects not available to the Data Import Wizard, as well.


 Image: Data Loader Installation. Find it by Searching “Data Loader” in the Setup > Quick Find menu.


This is not the “end all, be all” list of ways to import and export data, however, it’s a great list to get you started with highly functional tools that are very useful in making the most of your Salesforce journey! 


Thursday 3 September 2020

[#Blogged] - Salesforce Administrator Guide: Propelling your Career Forward - Part 6

Welcome to Part 6 in my series Salesforce Administrator Guide: Propelling your Career Forward! In Part 6, I want to discuss tools for process automation. As an Admin, you will be asked to not only add fields, or adjust page layouts, but also to implement processes to help your end users get through their day more efficiently. There are a host of tools you can use for various automation requirements, ranging from small and quick to the whole kit and caboodle. Let’s go over three tools for Process Automation, so you can learn how to make your Salesforce org an efficient machine!


Three Tools for Process Automation

Process Automation is not something that should scare you, but should invigorate you. There are a lot of great ways in Salesforce to grab information from one area, populate it in another, or reduce clicks and time spent by your end user. Familiarising yourself with these three tools is essential for taking your career to the next level and can improve your ability to analyse the best options for the job.


Workflow Rules

Workflow rules are great for small, easy changes that have simple requirements and are focused on one object. You can create logic that triggers an action of creating a New Task, New Email Alert, New Field Update, New Outbound Message, or any existing action. In this example, I used a workflow rule to evaluate the Industry field on the Account object to update a separate custom field called “Enterprise Industry”. The action is a field update, which will check the box as “True” if the criteria are met. Quick and easy, Workflow Rules are a great option for these types of automation.


Process Builder

For the past few years, the Process Builder has been the darling of Automation in the world of Salesforce. Due to its ability to execute more actions than a workflow rule, and it's easy to use interface, the Process Builder is a great choice for holding many changes for a single object that need to run upon edit or create. Let’s take the example above for the workflow rule: if you also wanted to add an update for Chatter to go along with your field update, you would set up this scenario in the Process Builder, instead of using a workflow rule. This tool is more versatile and is easy enough for an Admin to use along the various stages of their Salesforce journey.


Flow Builder

This is a more advanced tool, but is one that Admins can still take advantage of, nonetheless. Flow is a step up from Process Builder and is quickly becoming the new favorite tool. Flow has more capabilities all around, is more robust, and is the last step in Admin tools (at the moment) before crossing the threshold into becoming a developer. Flow can do everything from grab records and evaluate before taking action, loop through collections of records to seek or update information, and even make decisions based on input from your end users on a screen. This is worth spending a lot of time exploring and getting some hands-on practice!


Image: Just the tip of the iceberg compared to what this tool can do...


If you can become familiar with those three tools, you can definitely step up your Salesforce skills. Remember, practice is key, so make sure you remain patient, learn from your mistakes, and keep moving forward!


Saturday 29 August 2020

[#Blogged] - Salesforce Administrator Guide: Propelling your Career Forward - Part 5


Part 5: The Lowdown on Salesforce Permissions

In Part 5 of our series Salesforce Administrator Guide: Propelling your Career Forward, let’s take a few minutes to discuss Salesforce Permissions. To be clear, Salesforce permissions run deep and wide, and you will eventually need to put in a decent amount of time to become an expert at this, however, today we’re just going to go over some basic terms to make sure you understand the gist of things.  Let’s dive in!


Image: OWD and Sharing Settings


Organization-Wide Defaults (OWD) - This controls the record level access for the entire org, on whether records should be privately viewed or not. For example, you may not want Sales reps to see each others’ Opportunities, so you can make the Opportunity object private.


Role Hierarchy - As you create users in Salesforce, you determine which Role they may be in, such as Sales rep or Services rep, for example. Specific roles can be nested under others, such as the Sales Rep, which looks up to the Sales Manager, which looks up to the VP of Sales. You can grant record access based on Role Hierarchies to ensure a Manager can always see his rep’s records. 


Sharing Rules - These are another way to work within the OWD you have set, to allow users to see certain records. You can set up Sharing Rules to work with Public Groups that you have established, in order to grant access to certain records with specific criteria. This is a great way to share records across departments.


Manual Sharing - Manual sharing is an option for individuals to share individual records. Maybe your sales rep only needs to share a record with the Service rep once or twice a month, and they only need to see one or two at a time. This would be a good way to allow record sharing without the setup involved for sharing rules.


Field Level Security - Also known as FLS, field level security is where you can allow certain profiles to have access to a field. You may find that some fields should remain hidden from lower level end users, or reserved for a specific department, such as Finance. This allows you to limit clutter and unauthorized permission.


Image: The Role and Profile are located on the User Record


Profiles - Each user record has a profile, which houses object and system permissions. These are separate from roles, in that these give what is known as “CRED” access: Create, Read, Edit, or Delete. This allows your user to take those actions on records, and should be thoughtfully considered before doling out. 


Permission Sets - The idea of Profiles is to give users that need the same permissions their access in a way that’s easiest for you as an Admin. You simply don’t want too many profiles. However, you may find that there are permissions that may be needed for a select group of users that are very specific to an object or setting that others should not have. A permission set can be created and added to the user record to grant that access.


That’s a lot - and only scratching the surface. If you’re looking for a pretty awesome trailhead on this topic, check out the Data Security module.